Differenze tra le versioni di "Mostri del Ghiaccio"
| [versione verificata] | [versione verificata] |
| Riga 1: | Riga 1: | ||
{{subpage|[[Pagina principale|Metin2Wiki]]|[[Mostri:Info|Portale Mostri]]}} | {{subpage|[[Pagina principale|Metin2Wiki]]|[[Mostri:Info|Portale Mostri]]}} | ||
| − | {| class="sortable" {{Prettytable}} | + | {| width="100%" class="sortable" {{Prettytable}} |
|- {{Colore01}} | |- {{Colore01}} | ||
! class="unsortable" |Immagine | ! class="unsortable" |Immagine | ||
| Riga 107: | Riga 107: | ||
| style="text-align:center;" | 97(1) | | style="text-align:center;" | 97(1) | ||
|[[Torre di Vedetta di Nemere]] | |[[Torre di Vedetta di Nemere]] | ||
| − | |||
|- | |- | ||
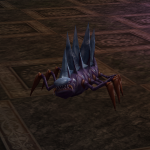
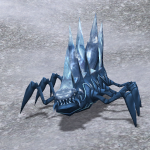
|[[File:Insetto del Gelo.png{{!}}link=Insetto del Gelo|150px]] | |[[File:Insetto del Gelo.png{{!}}link=Insetto del Gelo|150px]] | ||
| Riga 113: | Riga 112: | ||
| style="text-align:center;" | 99(1) | | style="text-align:center;" | 99(1) | ||
|[[Torre di Vedetta di Nemere]] | |[[Torre di Vedetta di Nemere]] | ||
| − | |||
|- | |- | ||
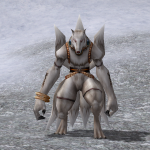
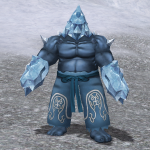
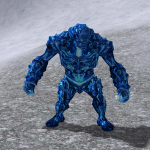
|[[File:Uomo del Gelo.png{{!}}link=Uomo del Gelo|150px]] | |[[File:Uomo del Gelo.png{{!}}link=Uomo del Gelo|150px]] | ||
| Riga 119: | Riga 117: | ||
| style="text-align:center;" | 100(2) | | style="text-align:center;" | 100(2) | ||
|[[Torre di Vedetta di Nemere]] | |[[Torre di Vedetta di Nemere]] | ||
| − | |||
|- | |- | ||
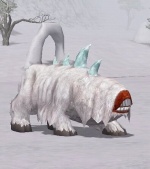
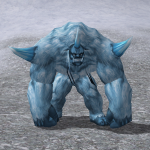
|[[File:Yeti del Gelo.png{{!}}link=Yeti del Gelo|150px]] | |[[File:Yeti del Gelo.png{{!}}link=Yeti del Gelo|150px]] | ||
| Riga 125: | Riga 122: | ||
| style="text-align:center;" | 100(2) | | style="text-align:center;" | 100(2) | ||
|[[Torre di Vedetta di Nemere]] | |[[Torre di Vedetta di Nemere]] | ||
| − | |||
|- | |- | ||
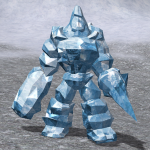
|[[File:Golem del Gelo.png{{!}}link=Golem del Gelo|150px]] | |[[File:Golem del Gelo.png{{!}}link=Golem del Gelo|150px]] | ||
| Riga 131: | Riga 127: | ||
| style="text-align:center;" | 100(3) | | style="text-align:center;" | 100(3) | ||
|[[Torre di Vedetta di Nemere]] | |[[Torre di Vedetta di Nemere]] | ||
| − | |||
|- | |- | ||
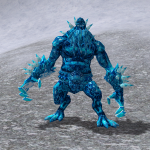
|[[File:Troll del Gelo.png{{!}}link=Troll del Gelo|150px]] | |[[File:Troll del Gelo.png{{!}}link=Troll del Gelo|150px]] | ||
| Riga 137: | Riga 132: | ||
| style="text-align:center;" | 100(3) | | style="text-align:center;" | 100(3) | ||
|[[Torre di Vedetta di Nemere]] | |[[Torre di Vedetta di Nemere]] | ||
| − | |||
|- | |- | ||
|[[File:Barba del Gelo.png{{!}}link=Barba del Gelo|150px]] | |[[File:Barba del Gelo.png{{!}}link=Barba del Gelo|150px]] | ||
| Riga 143: | Riga 137: | ||
| style="text-align:center;" | 105(3) | | style="text-align:center;" | 105(3) | ||
|[[Torre di Vedetta di Nemere]] | |[[Torre di Vedetta di Nemere]] | ||
| − | |||
|- | |- | ||
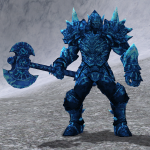
|[[File:Generale del Gelo.png{{!}}link=Generale del Gelo|150px]] | |[[File:Generale del Gelo.png{{!}}link=Generale del Gelo|150px]] | ||
| Riga 149: | Riga 142: | ||
| style="text-align:center;" | 105(4) | | style="text-align:center;" | 105(4) | ||
|[[Torre di Vedetta di Nemere]] | |[[Torre di Vedetta di Nemere]] | ||
| − | |||
|- | |- | ||
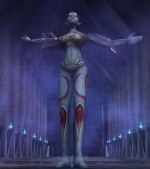
|[[File:Principe del Gelo.png{{!}}link=Principe del Gelo|150px]] | |[[File:Principe del Gelo.png{{!}}link=Principe del Gelo|150px]] | ||
| Riga 155: | Riga 147: | ||
| style="text-align:center;" | 107(4) | | style="text-align:center;" | 107(4) | ||
|[[Torre di Vedetta di Nemere]] | |[[Torre di Vedetta di Nemere]] | ||
| − | |||
|- | |- | ||
|[[File:Principe del Gelo.png{{!}}link=Szel|150px]] | |[[File:Principe del Gelo.png{{!}}link=Szel|150px]] | ||
| Riga 161: | Riga 152: | ||
| style="text-align:center;" | 107(Capo) | | style="text-align:center;" | 107(Capo) | ||
|[[Torre di Vedetta di Nemere]] | |[[Torre di Vedetta di Nemere]] | ||
| − | |||
|- | |- | ||
|[[File:Nemere.png{{!}}link=Nemere|150px]] | |[[File:Nemere.png{{!}}link=Nemere|150px]] | ||
| Riga 167: | Riga 157: | ||
| style="text-align:center;" | 108(Capo) | | style="text-align:center;" | 108(Capo) | ||
|[[Torre di Vedetta di Nemere]] | |[[Torre di Vedetta di Nemere]] | ||
| − | |||
|- | |- | ||
|} | |} | ||

